本教程介紹生活照的美化。生活照不同于專業的攝影作品。沒有任何修飾自然真實。處理的時候可以根據照片的需要給人物及背景美化。
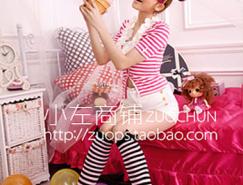
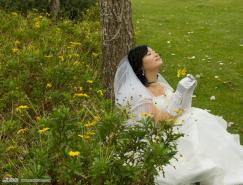
原圖

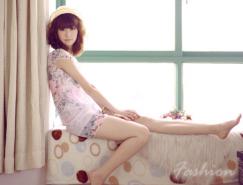
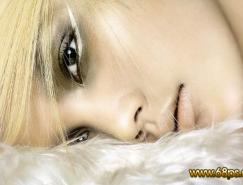
最終效果

1、打開原圖素材,新建一個圖層填充黑色,然后把圖層混合模式改為“色相”,效果如圖1。

<圖1>
2、新建一個圖層,按Ctrl + Alt + Shift + E蓋印圖層,然后把圖層混合模式改為“柔光”,效果如圖2。

<圖2>
3、創建亮度/對比度調整圖層,適當把對比度調大一點,參數設置如圖3,效果如圖4。

<圖3>

<圖4>
4、新建一個圖層,蓋印圖層,執行:濾鏡 > 藝術效果 > 繪畫涂抹,參數設置如圖5,確定后加上圖層蒙版,用黑色畫筆把人物部分擦出來,效果如圖6。

<圖5>

<圖6>
5、新建一個圖層,蓋印圖層,執行:濾鏡 > 模糊 > 動感模糊,參數設置如圖7,確定后把圖層混合模式改為“濾色”,效果如圖8。

<圖7>

<圖8>
6、創建色彩平衡調整圖層,參數設置如圖9,效果如圖10。

<圖9>

<圖10>
7、把背景圖層復制一層,按Ctrl + Shift + ]移到圖層的最上面,加上圖層蒙版,只保留人物部分,其它部分用黑色畫筆擦掉,如圖11。

<圖11>
8、創建色相/飽和度調整圖層,適當降低圖層不透明度,確定后,再蒙版上用黑色畫筆把背景部分擦掉,效果如圖13。

<圖12>

<圖13>
9、創建亮度/對比度調整圖層,參數設置如圖14,效果如圖15。

<圖14>

<圖15>
10、創建曲線調整圖層,參數設置如圖16,確定后只保留人物部分,其它部分用黑色畫筆擦掉,效果如圖17。

<圖16>

<圖17>
11、新建一個圖層,蓋印圖層,簡單的給人物磨下皮,再用減淡工具把人物臉部高光部分涂亮一點,效果如圖18。

<圖18>
12、新建一個圖層,蓋印圖層,把圖層混合模式改為“正片疊底”,圖層不透明度改為:60%,加上圖層蒙版用黑色畫筆把人物部分擦出來,效果如圖19。

<圖19>
13、新建一個圖層,蓋印圖層,整體修飾下細節,再適當銳化一下,完成最終效果。
<圖20>
推薦設計

優秀海報設計精選集(8)海報設計2022-09-23

充滿自然光線!32平米精致裝修設計2022-08-14

親愛的圖書館 | VERSE雜誌版版式設計2022-07-11

生活,就該這麼愛!2022天海報設計2022-06-02


最新文章

5個保姆級PS摳圖教程,解photoshop教程2023-02-24

合同和試卷模糊,PS如何讓photoshop教程2023-02-14

PS極坐標的妙用photoshop教程2022-06-21

PS給數碼照片提取線稿photoshop教程2022-02-13


