4、設置漸變映射,模式為明度,去灰加對比度,添加蒙板用畫筆擦掉過暗的地方。

5、使用曲線微調顏色,在調整時需要留意暗部和亮部的細節。

6、調整亮度/對比度,亮度21,對比度58,目的讓畫面更通透。

7、再次使用黑白漸變映射去灰作用,圖層模式,明度42%不透明度。

8、色相/飽和度-紅色明度+7,這是為了減弱皮膚的紅色。

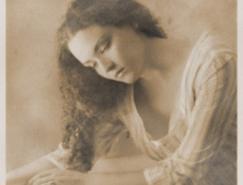
9、拖入選好的雪花素材,圖層模式為濾色,在這里我將雪花素材復制,建立圖層組蒙板擦掉一些不需要的地方,如擋住眼睛五官的地方等,完成最終效果。


最終效果:

原文地址:Photoshop后期處理:夢幻調照片教程
标签:照片處理


推薦設計

優秀海報設計精選集(8)海報設計2022-09-23

充滿自然光線!32平米精致裝修設計2022-08-14

親愛的圖書館 | VERSE雜誌版版式設計2022-07-11

生活,就該這麼愛!2022天海報設計2022-06-02


最新文章

5個保姆級PS摳圖教程,解photoshop教程2023-02-24

合同和試卷模糊,PS如何讓photoshop教程2023-02-14

PS極坐標的妙用photoshop教程2022-06-21

PS給數碼照片提取線稿photoshop教程2022-02-13


