
1.在3ds Max 中打開 Usb 閃存模型。

2.主體
創建一個 Max standar 材質,Ambient color 和 Diffuse color 設為 42.42.42,Specular level 和 Glossiness 設為30,在 reflection 通道中添加一個 Vraymap。在 reflection params 中激活 Glossy 功能,將 Glossiness 設為 100,SubPs 設為 8,Max depth 設為 3,并在 filter color 通道添加一個 Falloff 貼圖。

3.顯示屏外框
非常簡單,創建一個 VrayMtl 設置 Diffuse color 為 0,Reflect 為 32.32.32。
顯示屏玻璃
創建一個 VrayMtl,設置 Diffuse color 為 0,Relfect 為 255.255.255,并激活 Fersnel reflection。將 fog multiplier 設為 0.01。
LCD
創建一個 Blend 材質。
在上層通道添加一個簡單的黑色 VrayMtl。
在下層通道中插入一個 VrayMtlWrapper,將 Generate GI 設為 5;在 Base Material 通道中添加一個 max 標準材質,將其中的 Ambient、Diffuse 和 Self-illumination color 設為 211.99.0(RGB)。
最后,在 Mask 通道加入一個 LCD 文字的黑白位圖。
注意:如果USB的LCD關閉的話,可以將 Generate GI 降到1,并將 fog color 設為 255。

4.按鈕
創建一個 VrayMtlWrapper,將 Generate GI 設為 4,在 Base Material 通道中添加一個 VrayMtl,Diffuse color 為 255.255.0。Reflect color 為 35.35.35,Refrack color 為 210.210.210,Glossiness 設為 0.7,SubPs 為 40,選中 Use interpolation。
為了提高渲染速度,將 refract interpolation 設為 min=-4 max=-2。

5.USB 接口
創建一個 VrayMtl,Diffuse color 為 0,Reflection color 為 255,Glossiness 為 0.8,SubPs 為 5。

6.燈光和渲染
使用簡單的曲線擠出和3盞 Vray Light。
下圖為渲染設置

相關文章:
推薦設計

優秀海報設計精選集(8)海報設計2022-09-23

充滿自然光線!32平米精致裝修設計2022-08-14

親愛的圖書館 | VERSE雜誌版版式設計2022-07-11

生活,就該這麼愛!2022天海報設計2022-06-02


最新文章

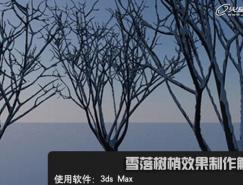
3ds Max實例教程:模擬實多媒體教程2010-08-13
3ds MAX建模實例教程:制多媒體教程2010-07-11
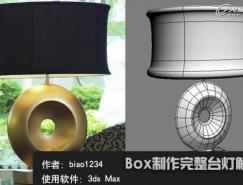
3ds Max教程:利用Box制作多媒體教程2010-07-11

3ds Max建模基礎教程:衛多媒體教程2010-07-11


