
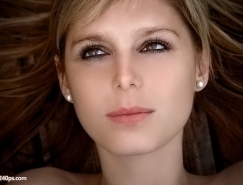
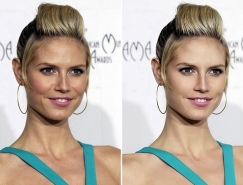
1、原圖膚質凹凸不平,而且臉上的陰影比較重,膚色由于曝光稍有不足的原因導致色調偏黑,不夠清新亮麗。
2、處理后的圖層,膚質比較光滑而不失皮膚原有的肌理,臉部的陰影減淡但不至于完全削減,保留了人物的輪廓美,其次,臉部稍作提亮后也更顯光澤,健康而自然。


2、彈出【高反差保留】對話框,在彈出的對話框中設置如圖所示的參數,然后單擊【確定】按鈕。

2、在彈出的【計算】對話框中將混合設置為“強光”,然后單擊【確定】按鈕。
3、將得到【Alpha 1】通道,再執行2次計算,得到【Alpha 3】通道。

2、圖像反選后,按下【Ctrl】+【H】組合鍵隱藏選區,在通道面板選擇【RGB】通道。


2、在彈出的【USM 銳化】對話框中設置如圖所示的參數,然后單擊【確定】按鈕。


标签:磨皮
推薦設計

優秀海報設計精選集(8)海報設計2022-09-23

充滿自然光線!32平米精致裝修設計2022-08-14

親愛的圖書館 | VERSE雜誌版版式設計2022-07-11

生活,就該這麼愛!2022天海報設計2022-06-02


最新文章

5個保姆級PS摳圖教程,解photoshop教程2023-02-24

合同和試卷模糊,PS如何讓photoshop教程2023-02-14

PS極坐標的妙用photoshop教程2022-06-21

PS給數碼照片提取線稿photoshop教程2022-02-13


