小夥伴們在臨摹圖標前一定要先觀察觀察,觀察不夠仔細沒關系,慢慢來,重要的是學習動腦筋,要學會把整體拆分為不同的部分,然後逐步刻畫。
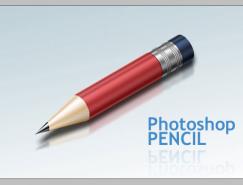
最終效果

1、鉛筆主要由五部分組成,如下圖。

2、筆頭用鋼筆勾出形狀,不是三角形的哦,有弧度的!高光也用鋼筆勾出來形狀,然後做高斯模糊處理。為了能隨意調整模糊度,需要轉化為智能濾鏡。

3、圓錐體部分分為三塊,顏色上均使用了漸變效果。看到高光沒有,方法同上,模糊度高一點,再加個蒙版,拉個實色到透明的漸變。

4、筆杆也是分為三塊,有兩高光,第一條明顯些,用白色,第二條暗一點,有環境色摻雜,用淡黃色。為了看起來自然點。注意漸變,自己慢慢調哦,我調的也不是很好,大家一起進步。

5、包橡皮的鐵皮就是個漸變,沒什麼了不起的。凹槽也是漸變,黑色的那些條條可以根做白調一樣用鋼筆勾形狀,也可以再白條上使用投影效果。

6、橡皮形狀很簡單吧!用圓角矩形,在勾個邊緣為弧形的形狀與它做布爾運算就可以了。效果有:添加雜色、內發光、漸變疊加和高光。

7、製作過程:
添加個三角形,兩個圓形合並形狀。

8、這個漸變可以在做筆頭的時候再加上去。

9、筆尖:高光的高斯模糊,我用的0.8,可以自己調整。

10、筆頭:


11、筆杆:


12、鐵皮:


13、凹槽效果:


14、橡皮:


15、高光的做法上面有提到哦!
最後將橡皮擦圖層複製一遍,去掉圖層效果,填充淡黃色,然後執行添加雜色命令,降低透明度即可。
整體鉛筆的陰影使用了高斯模糊,這個具體怎麼弄,請大家自己摸索。
最後說一句,大家做好鉛筆後,可以自己調整下長寬,讓鉛筆看起來萌萌噠。
最終效果:
标签:鉛筆圖標
相關文章:
推薦設計

優秀海報設計精選集(8)海報設計2022-09-23

充滿自然光線!32平米精致裝修設計2022-08-14

親愛的圖書館 | VERSE雜誌版版式設計2022-07-11

生活,就該這麼愛!2022天海報設計2022-06-02


最新文章

5個保姆級PS摳圖教程,解photoshop教程2023-02-24

合同和試卷模糊,PS如何讓photoshop教程2023-02-14

PS極坐標的妙用photoshop教程2022-06-21

PS給數碼照片提取線稿photoshop教程2022-02-13


