效果字花紋部分直接使用了花紋素材,定義成圖案後用圖層樣式加入到文字裏面;再加上金屬描邊和一些高光效果即可。
最終效果

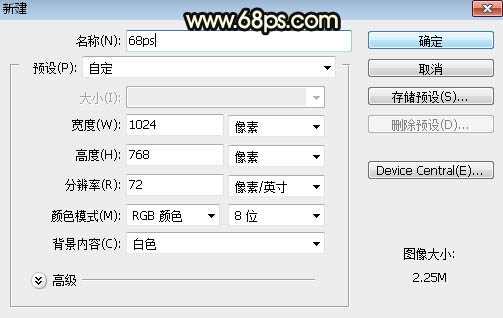
1、打開PS軟件,按Ctrl + N 新建畫布,尺寸設置如下,然後確定。
<圖1>
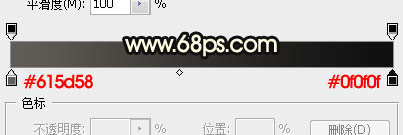
2、選擇漸變工具,顏色設置為灰色至暗灰色如圖2,然後由背景中心向邊角拉出徑向漸變,如圖3。
<圖2>

<圖3>
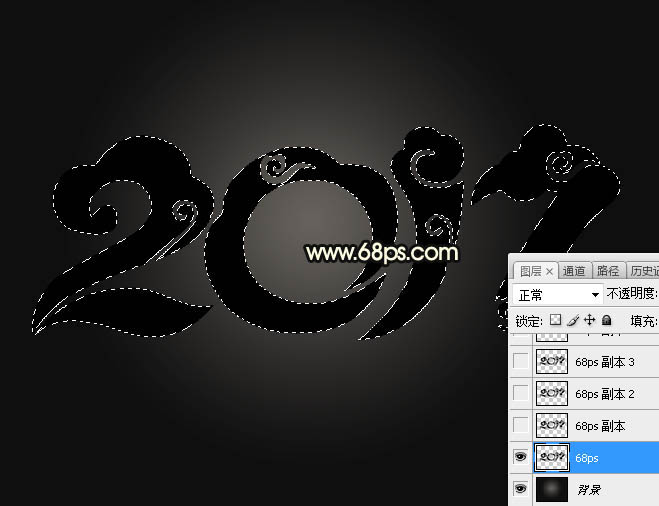
3、點這裏打開文字素材,然後保存到本機,再用PS打開,用移動工具拖進來,調整一下位置,如下圖。
<圖4>
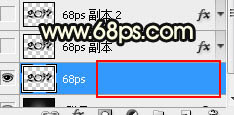
4、雙擊文字縮略圖後面的藍色空白區域調出圖層樣式設置面板,然後設置。
<圖5>
斜面和浮雕:
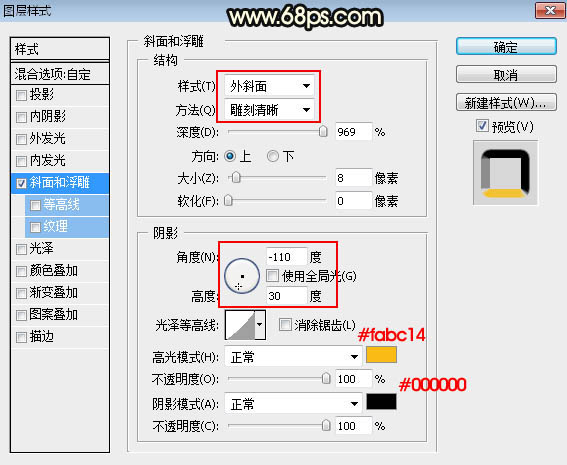
<圖6>
5、確定後把填充改為:0%,效果如下圖。
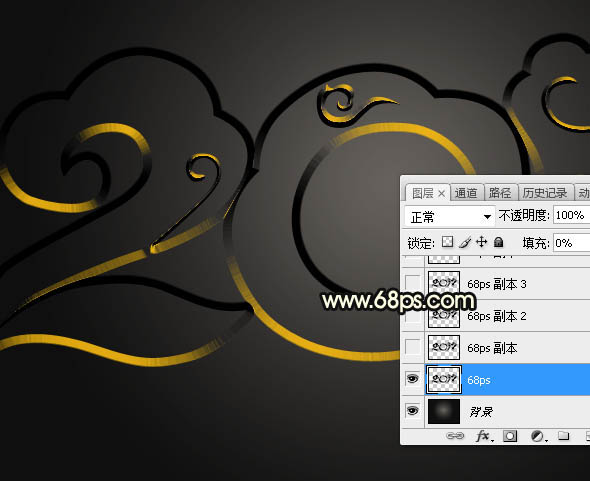
<圖7>
6、按Ctrl + J 把當前文字圖層複製一層,然後在當前文字縮略圖後面的藍色區域右鍵選擇“清除圖層樣式”,效果如圖9。
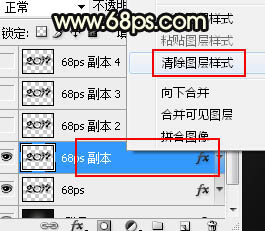
<圖8>
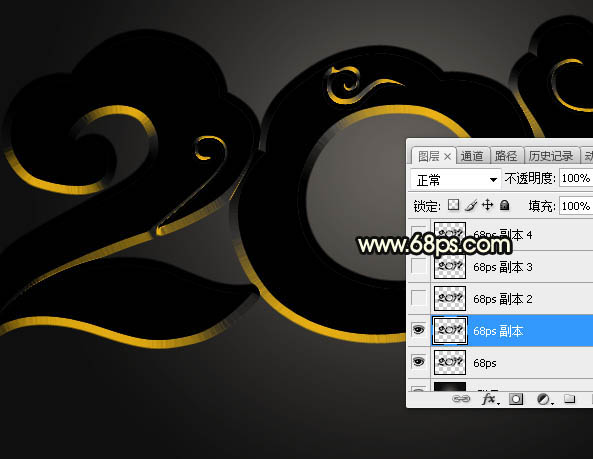
<圖9>
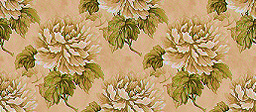
7、把下面的花紋素材保存到本機,用PS打開,選擇菜單:編輯 > 定義圖案,命名後關閉。
<圖10>
8、同樣的方法給當前文字圖層設置圖層樣式。
斜面和浮雕:
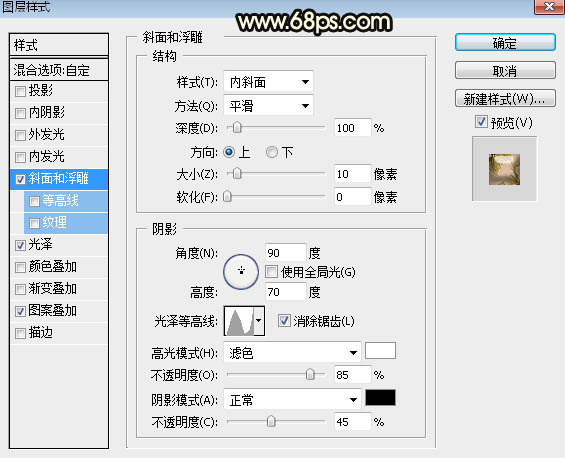
<圖11>
光澤:
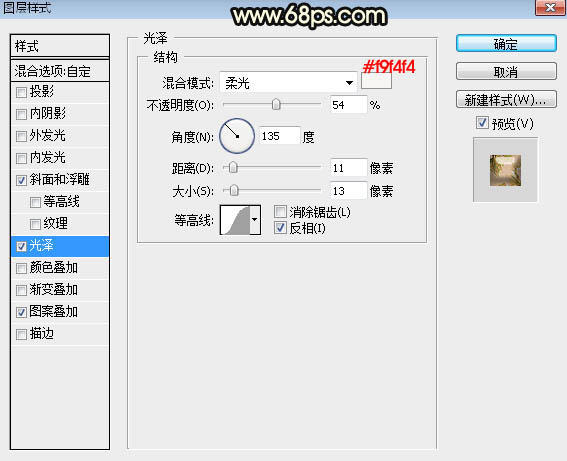
<圖12>
圖案疊加:選擇剛才定義的圖案。
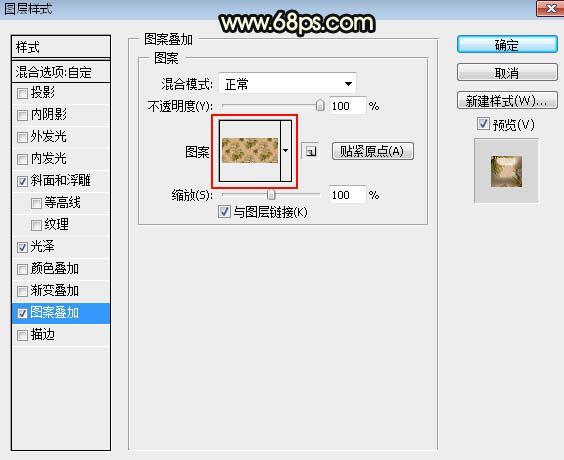
<圖13>
9、確定後,效果如下圖。
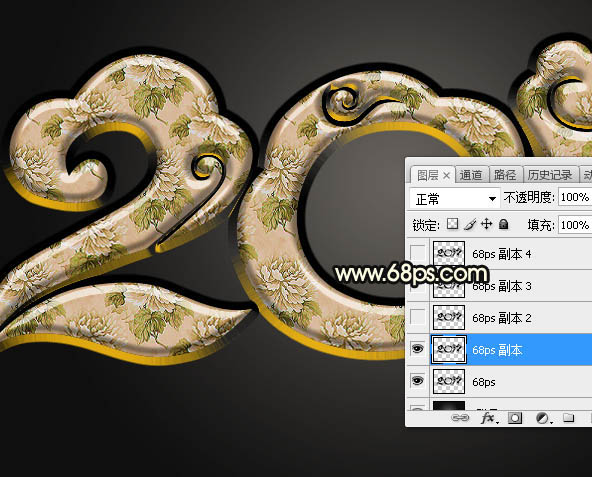
<圖14>
最終效果

1、打開PS軟件,按Ctrl + N 新建畫布,尺寸設置如下,然後確定。

<圖1>
2、選擇漸變工具,顏色設置為灰色至暗灰色如圖2,然後由背景中心向邊角拉出徑向漸變,如圖3。

<圖2>

<圖3>
3、點這裏打開文字素材,然後保存到本機,再用PS打開,用移動工具拖進來,調整一下位置,如下圖。

<圖4>
4、雙擊文字縮略圖後面的藍色空白區域調出圖層樣式設置面板,然後設置。

<圖5>
斜面和浮雕:

<圖6>
5、確定後把填充改為:0%,效果如下圖。

<圖7>
6、按Ctrl + J 把當前文字圖層複製一層,然後在當前文字縮略圖後面的藍色區域右鍵選擇“清除圖層樣式”,效果如圖9。

<圖8>

<圖9>
7、把下面的花紋素材保存到本機,用PS打開,選擇菜單:編輯 > 定義圖案,命名後關閉。

<圖10>
8、同樣的方法給當前文字圖層設置圖層樣式。
斜面和浮雕:

<圖11>
光澤:

<圖12>
圖案疊加:選擇剛才定義的圖案。

<圖13>
9、確定後,效果如下圖。

<圖14>
标签:花紋字
推薦設計

優秀海報設計精選集(8)海報設計2022-09-23

充滿自然光線!32平米精致裝修設計2022-08-14

親愛的圖書館 | VERSE雜誌版版式設計2022-07-11

生活,就該這麼愛!2022天海報設計2022-06-02
最新文章

5個保姆級PS摳圖教程,解photoshop教程2023-02-24

合同和試卷模糊,PS如何讓photoshop教程2023-02-14

PS極坐標的妙用photoshop教程2022-06-21

PS給數碼照片提取線稿photoshop教程2022-02-13


