這次的PS教程主要介紹如何用Photoshop作出高品質的圖像。學習用新的方法來創建自然肌膚效果,本教程沒有用任何的額外的插件。
效果圖:

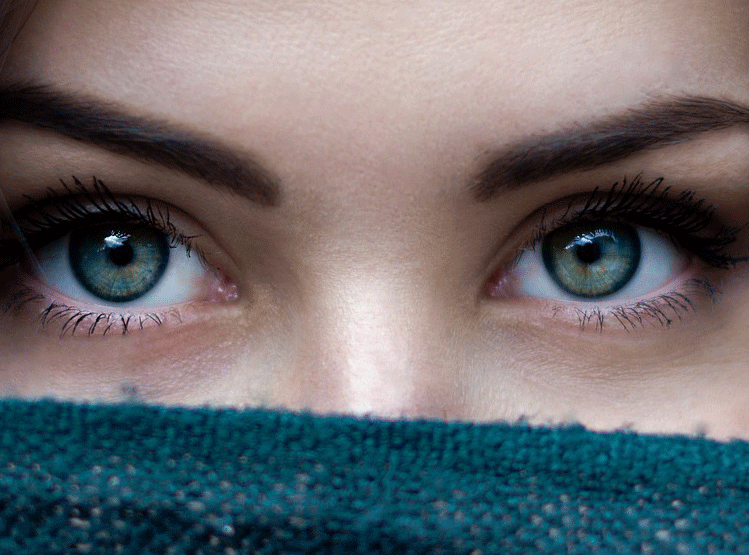
打開圖片。記住不是所有的圖像可以適合這個修飾風格。你應該選擇一幅高質量和人物皮膚不要過于光滑)或模糊,至少應該清晰可見毛孔


這一步后,一個完美的皮膚清潔就完成了,你能看到我臉上運用這個工具的軌跡如下:


蓋印一個圖層,濾鏡―銳化―智能銳化


Step 3第三步
合并所有圖層了。現在我將使用一個方法你可以不使用前給人留下一個好的尋找皮膚。確保所有零件清洗皮膚,否則將看起來可怕的使用這一步驟。
選擇濾鏡―其它―自定:


我要用一些調整層,以改變膚色使它看起來好多了。創建一個可選顏色調整層


标签:Photoshop


推薦設計

優秀海報設計精選集(8)海報設計2022-09-23

充滿自然光線!32平米精致裝修設計2022-08-14

親愛的圖書館 | VERSE雜誌版版式設計2022-07-11

生活,就該這麼愛!2022天海報設計2022-06-02


最新文章

5個保姆級PS摳圖教程,解photoshop教程2023-02-24

合同和試卷模糊,PS如何讓photoshop教程2023-02-14

PS極坐標的妙用photoshop教程2022-06-21

PS給數碼照片提取線稿photoshop教程2022-02-13


